
I have been underground studying for my FRCPath Part 1 exam, which naturally means I’ve been working on a number of different projects. And heads up, I’ve got a few Amazon affiliate links in here if you fancy buying something to support the site.
The list of jobs for the house is never ending. None of them are major, really, just maintenance and minor improvements. We’ve been trying out Gusto recipe boxes recently, which are not dissimilar to Hello Fresh. You get sent a box of ingredients and recipes for several meals, but I’m not here to talk about Gusto (though if you want to give it a try, I’d certainly recommend it). I’m more interested in the packaging!
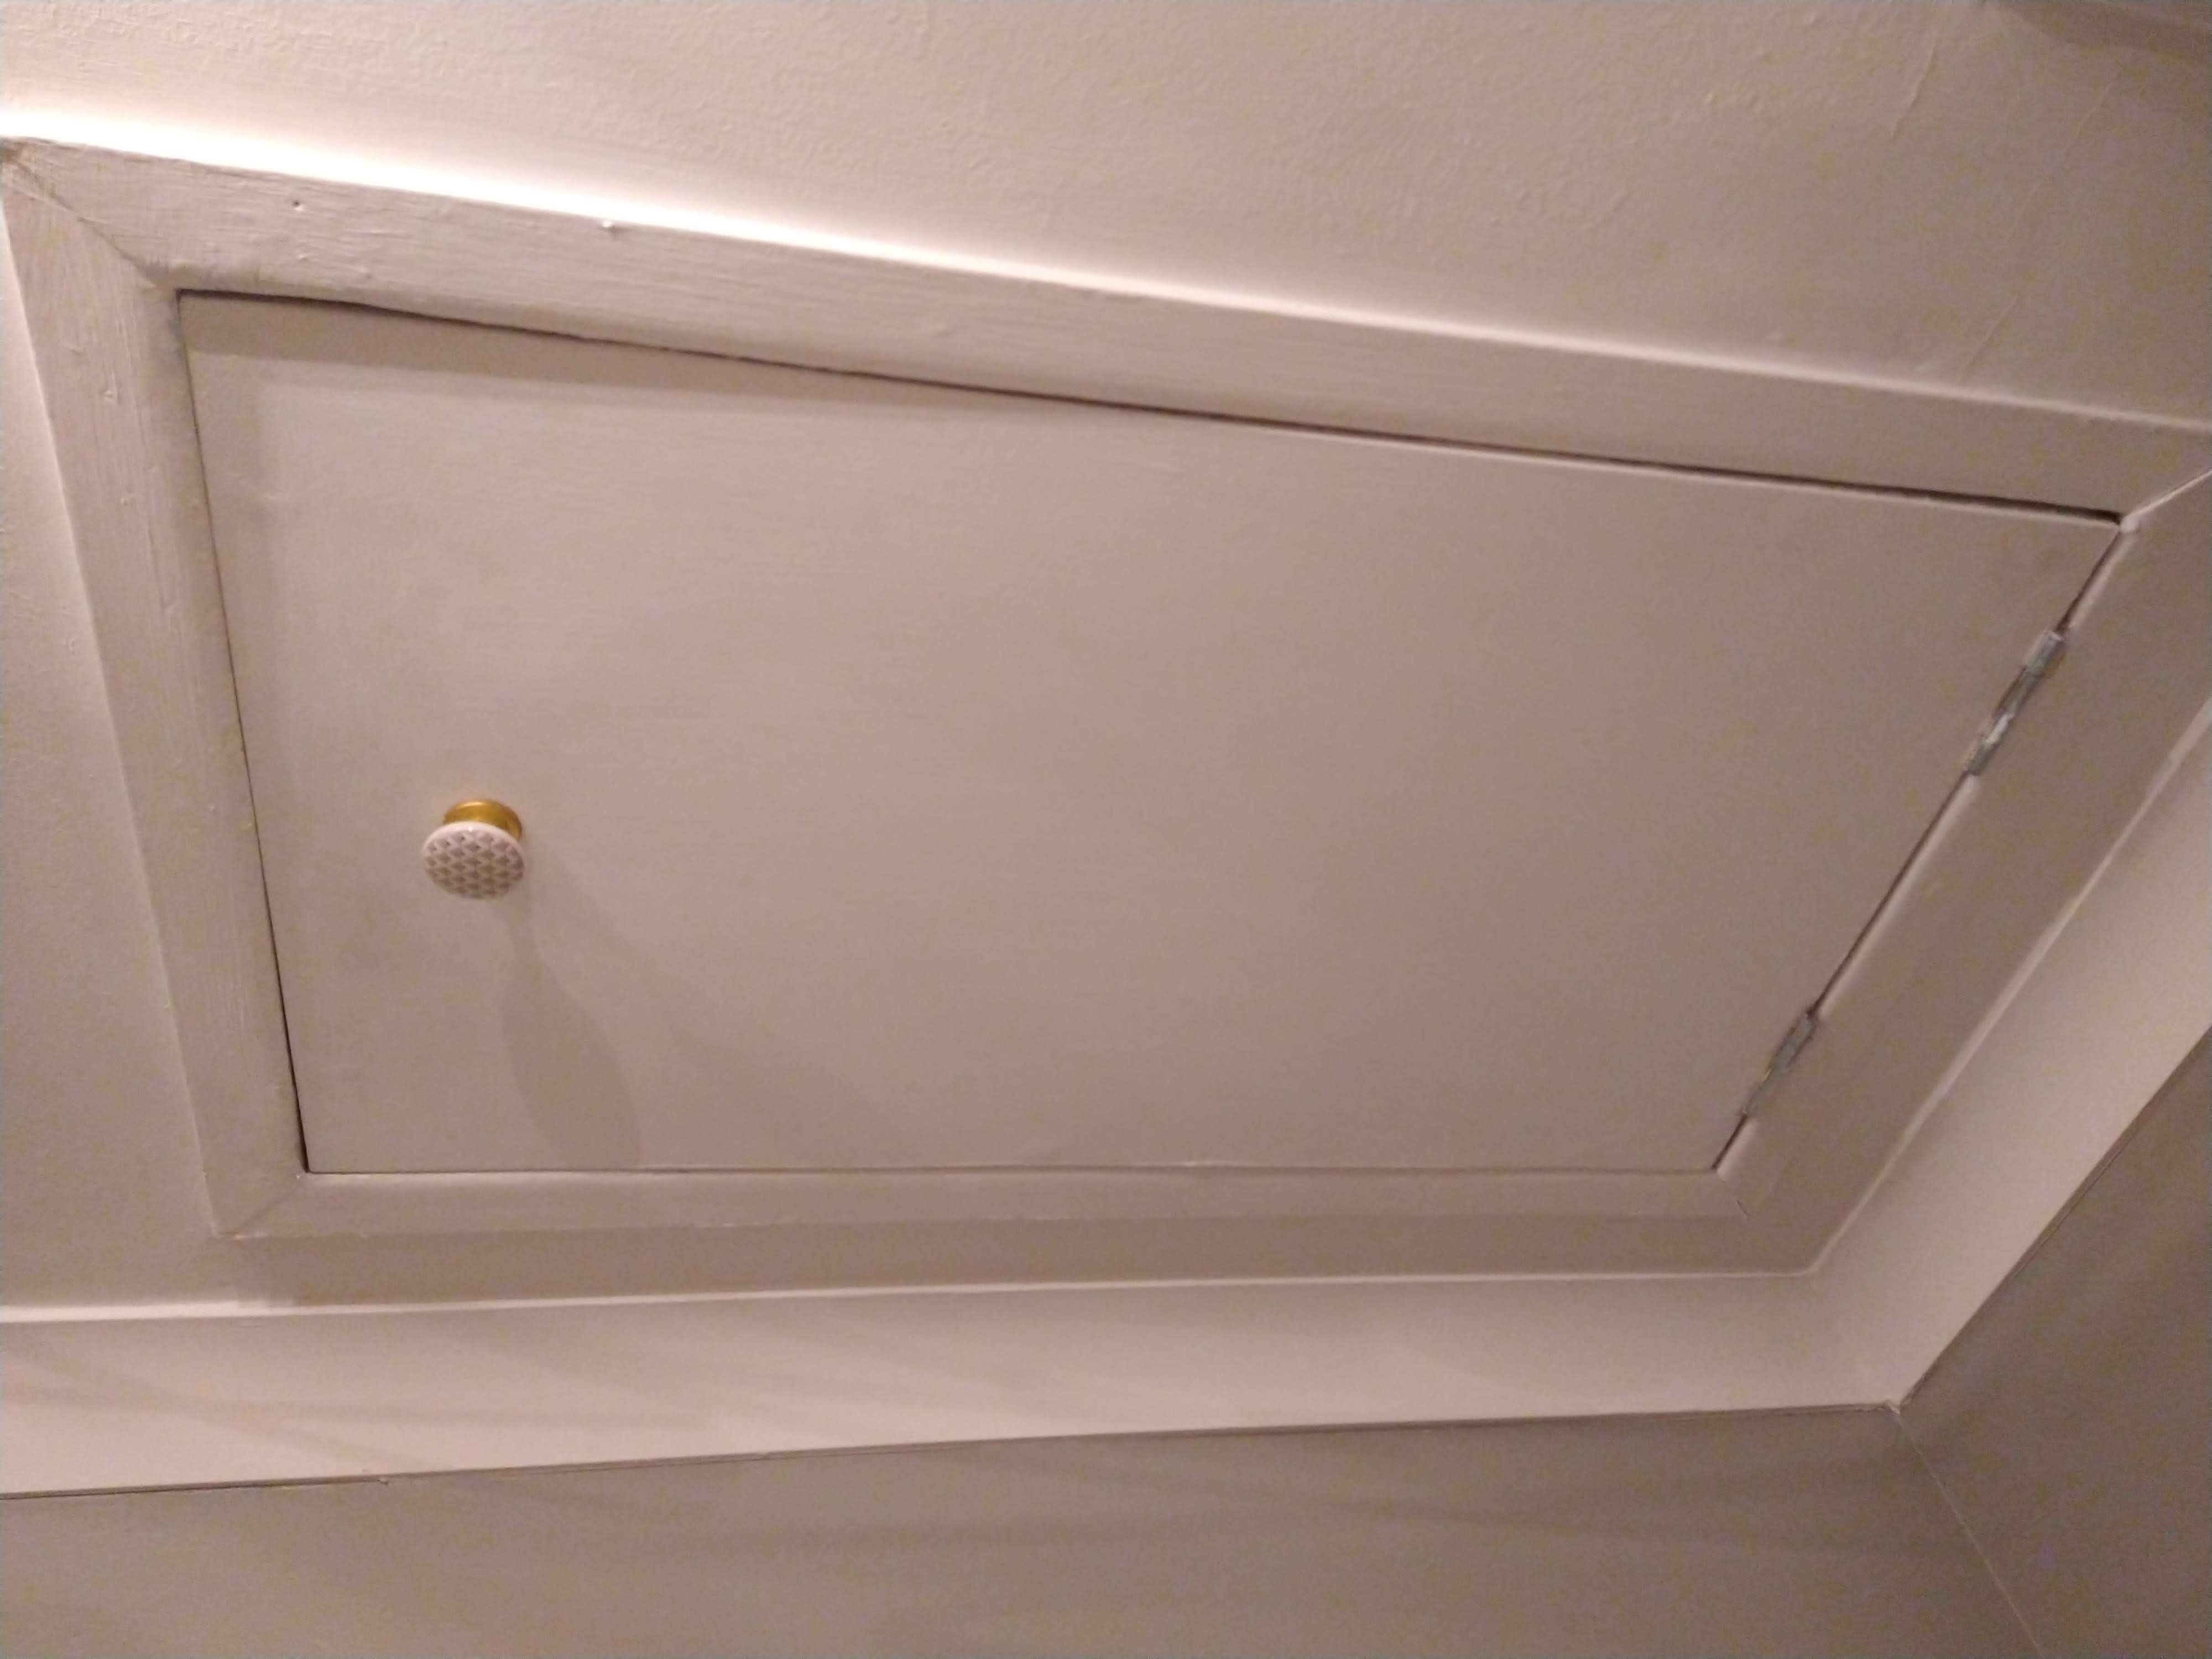
Loft Hatch Insulation (Cheers Gusto!)

The refrigerated items are packed with ice, and surrounded by natural wool insulation. What does one do with conveniently sized insulating sheets? Make an insulated loft hatch of course. After my last bedside table project I had spare door knobs to use and Sarah suggested fitting one to the loft hatch, which was frustratingly difficult to open in the past. Seamless looks, useless function.

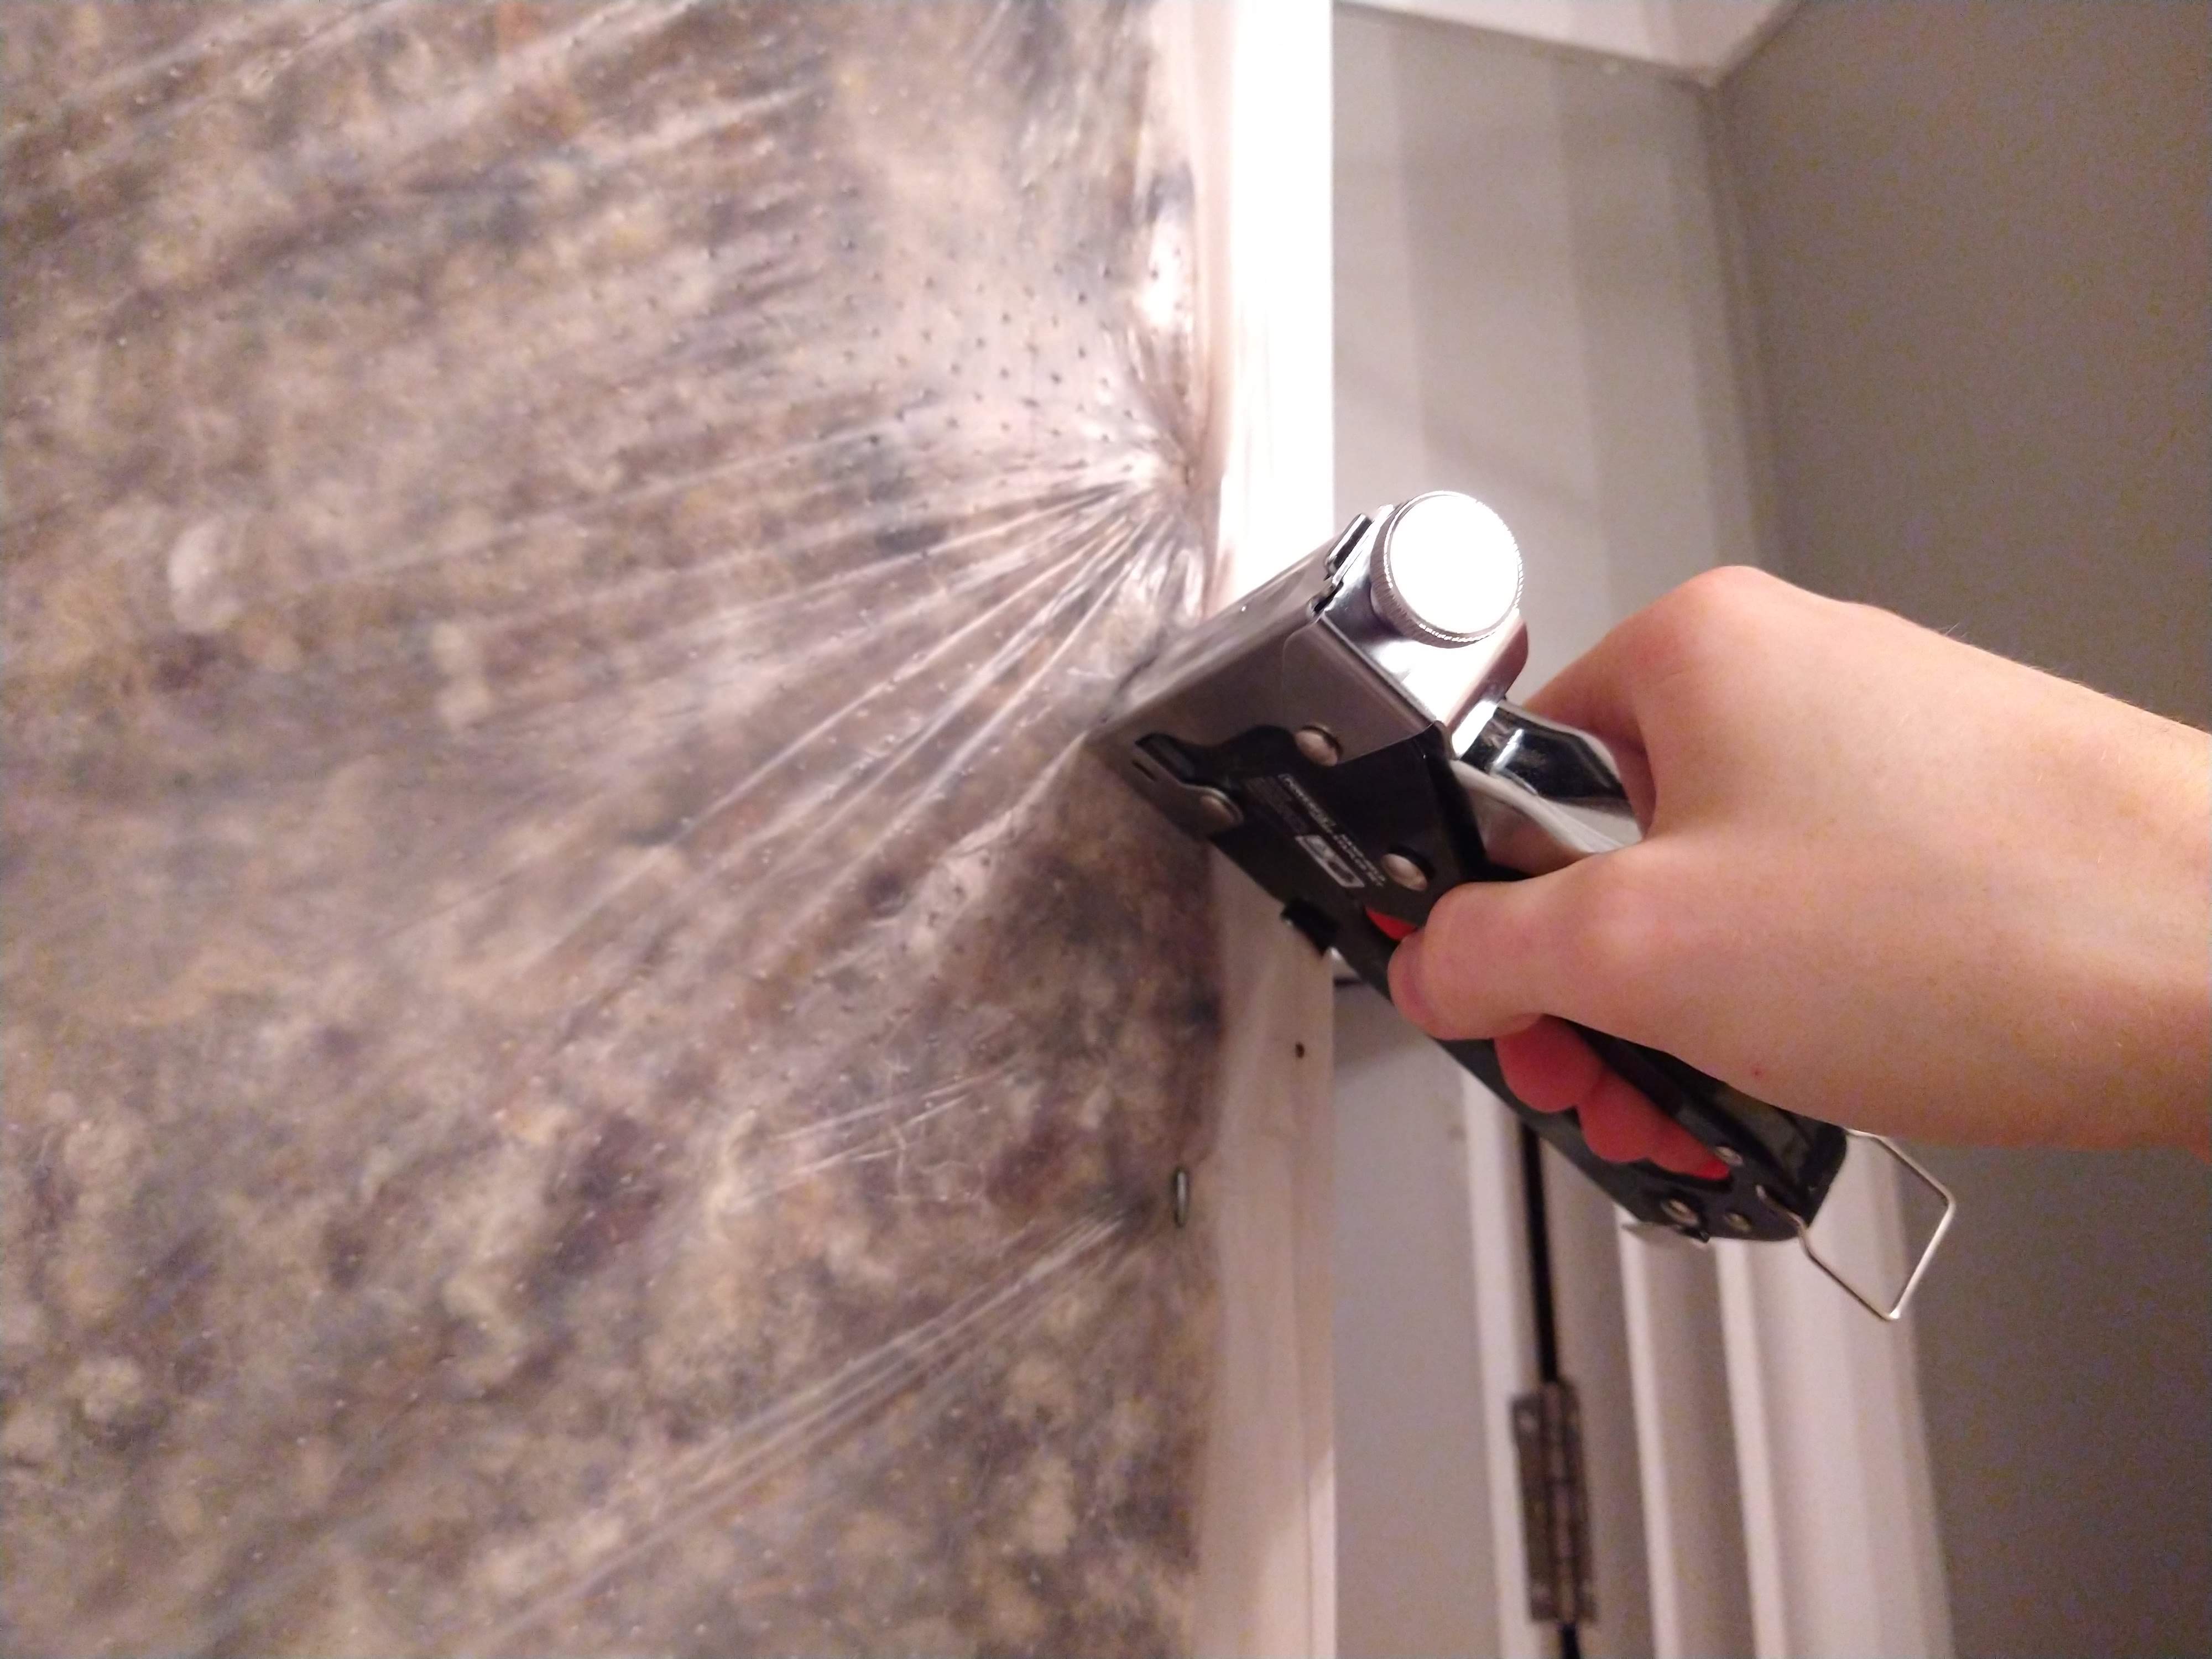
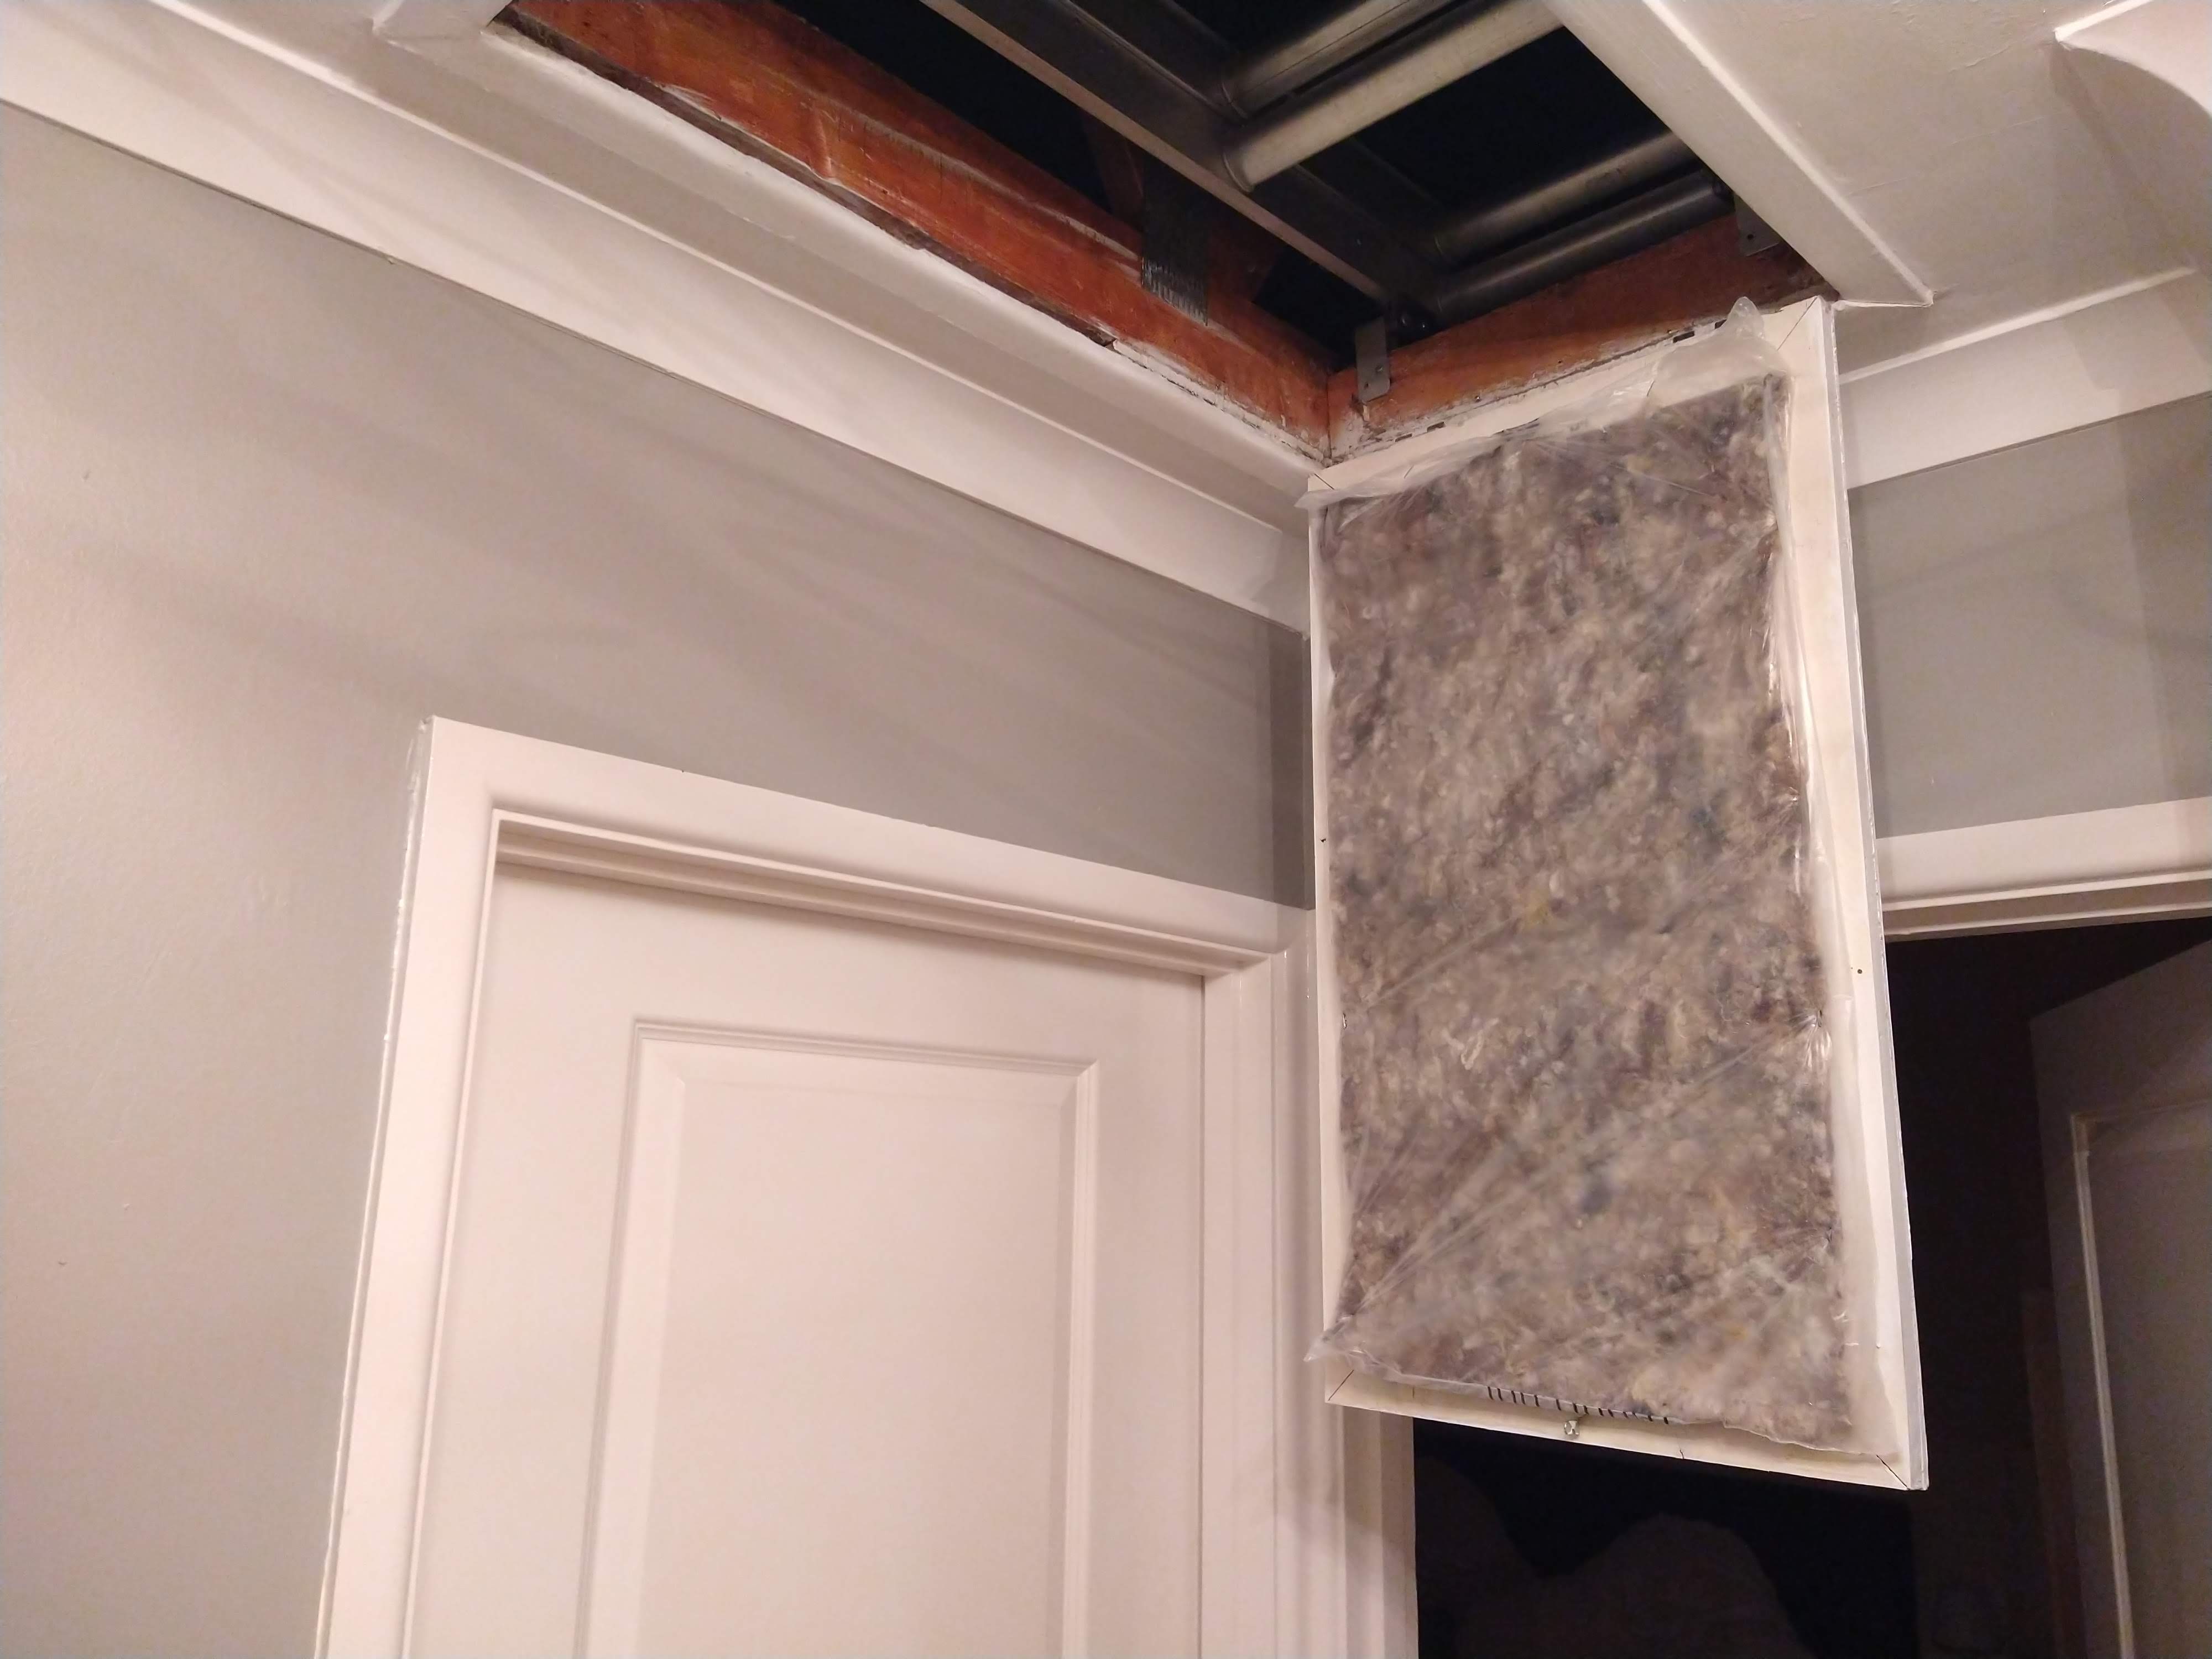
The before, during, and after shots. With the use of my handy staple gun from Lidl I attached the insulation to the inside of the loft hatch door. It was almost the perfect size, as if it was made for the job. The next step is to raise the floor of the attic, and add an additional layer of insulation. One job down, onto the next one.
The Magnetic Spice Rack
I have wanted a decent spice rack since moving into the house. The spices have been randomly assorted on the windowsill since we moved in, and that is just not compatible with my ideal kitchen. After some research into spice rack design, I settled on a magnetic concept. The space to the right of the hob was ideal and I bought some steel sheet from B&Q around Christmas time.


I chose silicone adhesive/glue because of the flexibility and strength. Being right beside the hob there is potential for a lot of temperature variation, and expansion and contraction of the steel. It is really easy to work with, and adjustable until about ten minutes setting time. Keeping the steel flat was another story. I ended up using the heaviest items in the kitchen – my butcher’s block and cast iron frying pan.


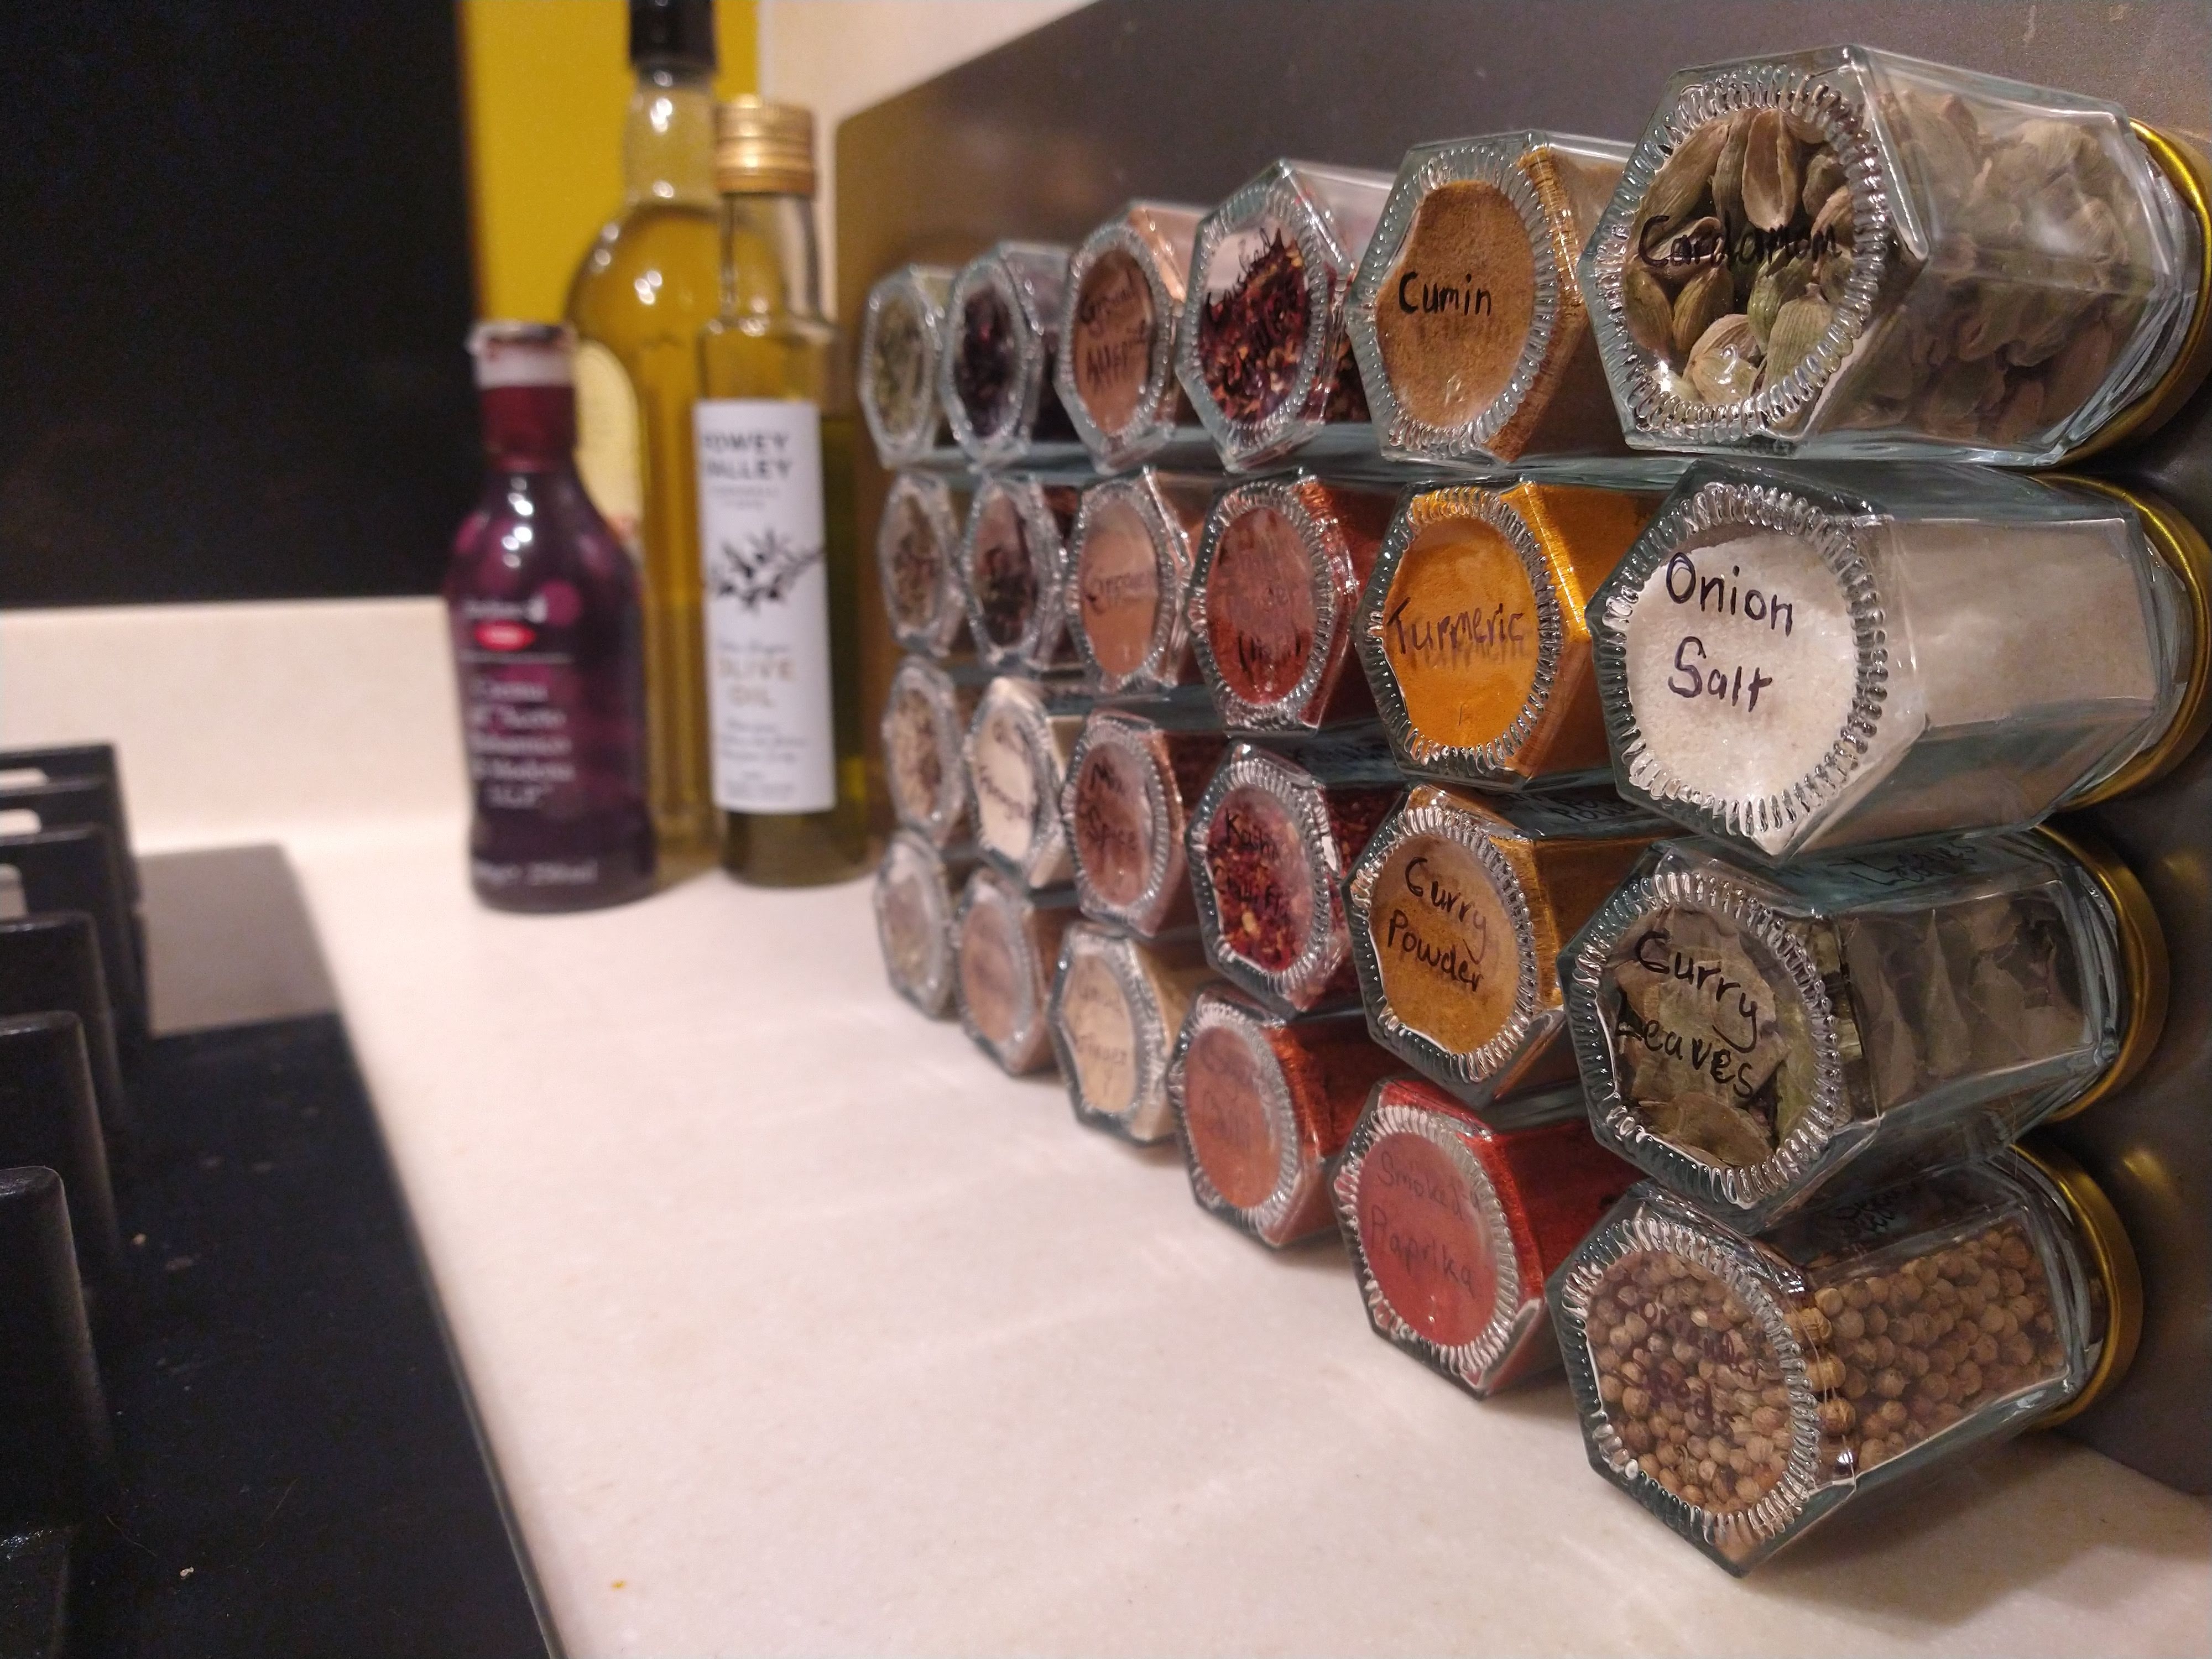
The next step was sticking the magnets to the jars. I bought hexagonal spice jars from Hobbycraft to fit in with the modern aesthetic of the kitchen (you can get similar jars from Amazon here), and a variety of neodymium magnets from Amazon. The first attempts with smaller magnets stuck to the inside using epoxy adhesive were less successful, but I moved onto larger magnets attached to outside of the jar lid. (the 20mm N52 neodymium magnets are here)
I am quite happy with the overall appearances of the spice rack, though it’s difficult to make out the name of some of the spices.
Back to Bread
I’ve been working on my sourdough game recently. The starter is becoming more and more active, and I’ve been getting good results with the addition to honey. The next step is a longer initial fermentation time. The recipe I’m using at the moment is from the BBC, and takes 500g flour, 300g sourdough starter, 1 tbsp honey and 1 tsp of salt. Simple, but effective.

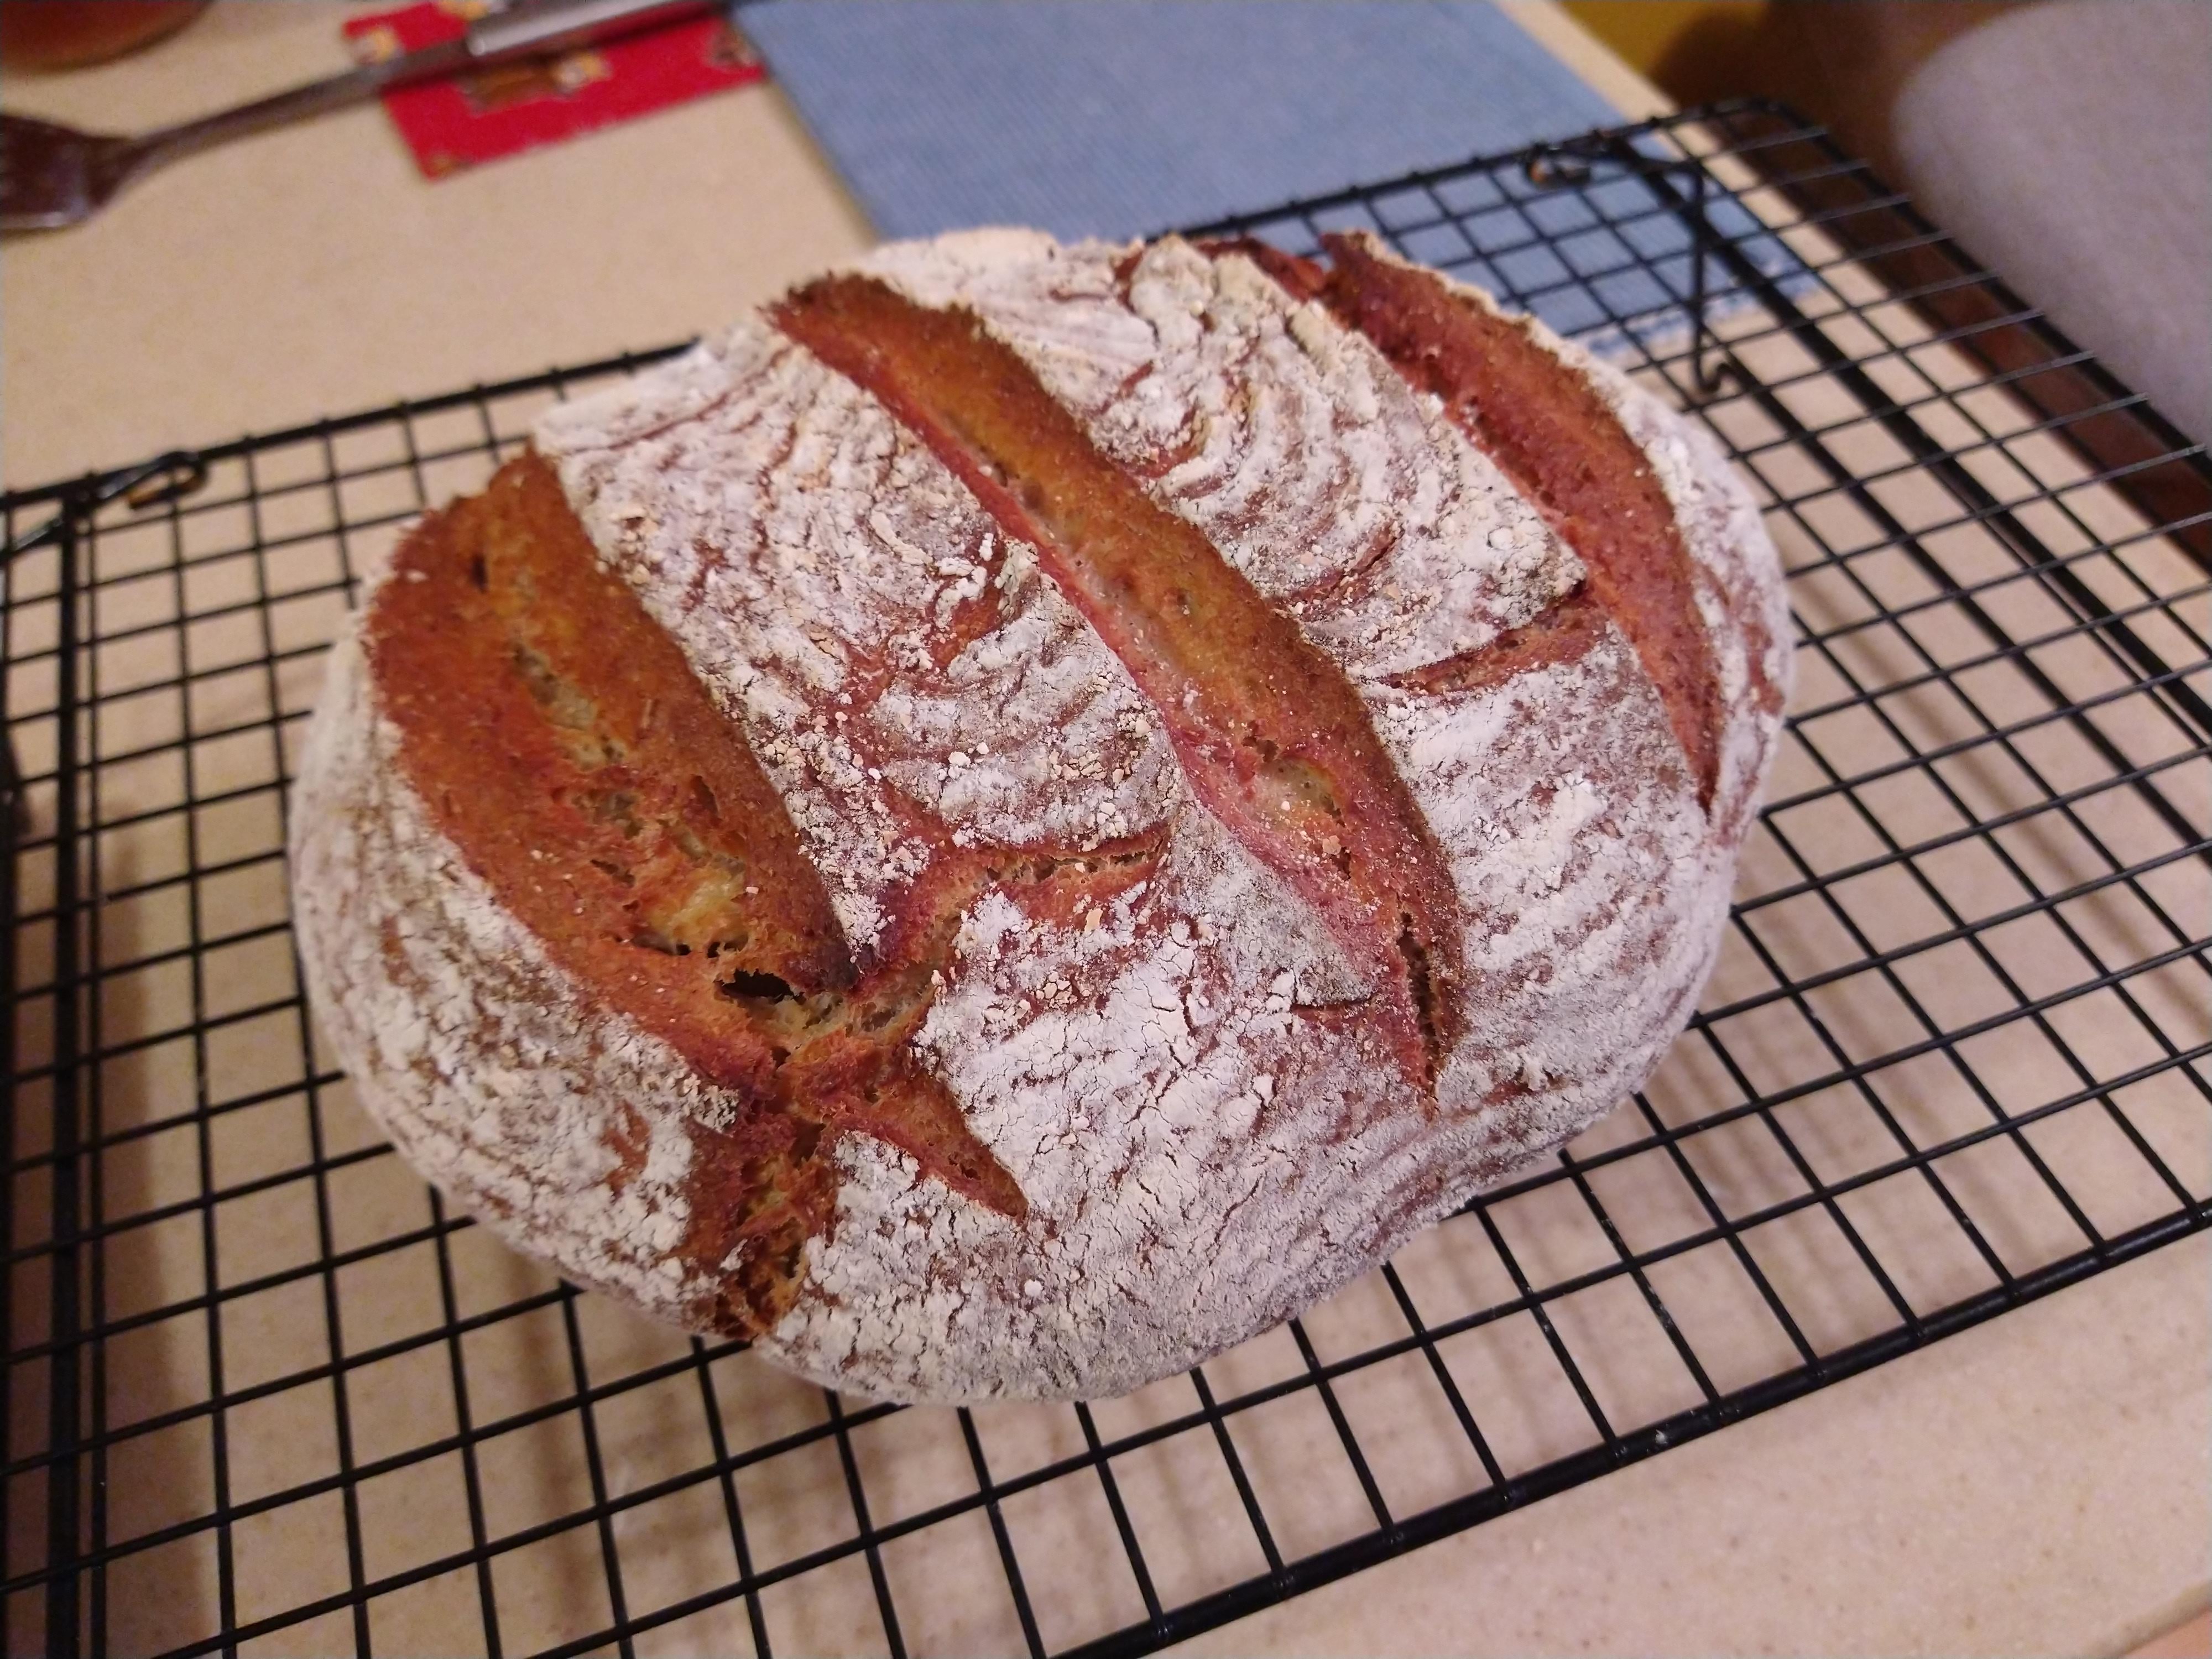
I like the effect of the banneton with concentric rings. The first loaf had a higher proportion of strong white flour and a longer bulk rise step. The experimentation will continue!
Keep an eye out for more sourdough adventures soon.

Leave a comment