
I’ve been busy. Busy executing a woodworking project more ambitious and ill thought-out than any that has come before, and all in the midst of an unprecedented national and global crisis.
I have reasons! First, it’s a project I can work on without having to leave the house. Second, I was able to acquire a variety of skills. Third, it was actually quite good exercise. The weather has been fantastic over the last week, with temperatures reaching 20 degrees Celsius so being outside has been a pleasure.
In the last post, I cut a couple of pieces of wood (decking planks) and extended the future herb bed. And now, I’ve created two completely new raised beds from oak sleepers.

480kg of oak, and four tonnes of soil. I had considered buying longer sleepers and screwing them together, but I found a deal on a pallet of 800mm sleepers from UK Timber on eBay. It ended up being cheaper than I expected, but you don’t always pay with money…
…unless you buy the right sized sleepers. Sleepers are lengths of wood originally used for constructing railway tracks, but the name refers to any similar piece of wood. Reclaimed railway sleepers can be used in the garden, but most have been treated with creosote (a probable carcinogen) and are not really suitable for vegetable beds or anywhere people come into contact with. Another (cheaper) option is treated softwood – that is, softwood sleepers treated with biocidal compounds to preserve the wood and slow rotting. Most of these are relatively safe, but they don’t tend to age as well as hardwoods and run the risk of leaching chemicals into the soil. That leaves us with hardwoods, the most popular of which is oak. Beautiful looking and tough as nails. A great material, but you better hope your tools are sharp and your drills are powerful.
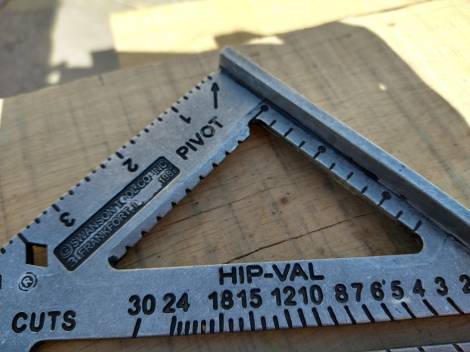
After taking advice from Doug next door (no relation), I set about marking up the wood. He advised using lap joints to connect the middle sleepers, and big screws to fix the end pieces together. I had never (knowingly) cut a lap joint so set about doing so with a handsaw. Following an unsuccessful attempt, I quickly moved on to the power option. I inherited an Elu router from my grandad a few years ago but wasn’t brave enough to try it out. High speed bits capable to chopping chunks out of people were discouraging me from experimenting. This was the perfect opportunity to give it a go, and a few dodgy cuts later I had figured it out.

Each piece needed half the thickness removed (25mm), so it could fit in with the piece adjacent to it. In the beginning it took me about six minutes to set up each piece of wood and finish the joint. I got it down to a couple of minutes when I stopped caring about aesthetic perfection. It’s a rustic project, of course. When you have to cut 48 sleepers, you’ll understand.
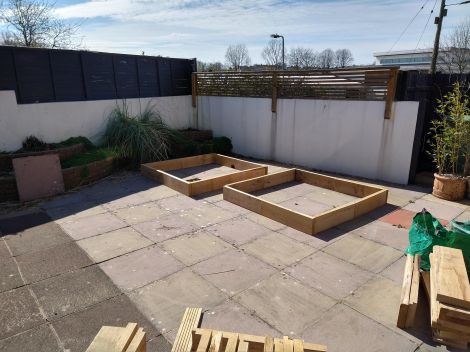
We had plenty of patio not doing anything. I can’t stand lazy patios so it was time to put it to work. I experimented with a diamond-shape design to mirror the decking but for practical purposes settled on two square beds slightly offset from each other, with enough space to get a wheelbarrow in. Being able to easily access and maintain the beds was a big consideration in the design.
Drainage was another factor. Paving slabs were no good, so I lifted the four central slabs at the base of each bed and dug down to see what lay beneath. Happily there was a few inches of compacted sand and gravel which was easily broken up, and to this I added rough gravel I was given by some work colleagues. Something was missing, though.


I ordered four tonnes of topsoil blended with compost, from South Devon Turf. I put in the online order on Sunday, and it was delivered on Friday evening by one of their very helpful drivers. The service was excellent, and the price was one of the best on the market. £67 per tonne bag of topsoil at the time of writing. All I needed was something to move it. And to finish building the beds. Thankfully the wheelbarrow I ordered from VonHaus arrived on Saturday morning. Not so ideal was the punctured tyre which I managed to repair with reasonable success.

After a lot of hauling sleepers around the garden, I was ready to assemble the beds. The wood was rough cut and definitely not perfect – there were small variances (sometimes not so small) in length and depth so my initial plan to level everything wasn’t going to be worth the time. Instead I opted to put together corners, screwing two sleepers together at right angles with the Timberfix screws, then fixing the central joints with shorter 40mm screws and glue. It was Sunday afternoon and rain was predicted for that evening – the race was on.

The hardness of the oak was becoming an issue. My cordless impact driver quickly ate through one battery, then another. I only had two batteries so they went for charging and I switched to a corded drill. First I used the Dewalt my brother gave to me. It worked fairly well, but started to struggle when using the longer (250mm) screws to stabilise the sleepers vertically. I ended up switching to the old Black & Decker, and finally my Tesco Powerforce drill which did a surprisingly good job. I found the best method to be drilling through the first sleeper, almost the entire length, then using the Timberfix screw for the last 50mm or so. Even that taxed the drills, showing just how hard the oak was.
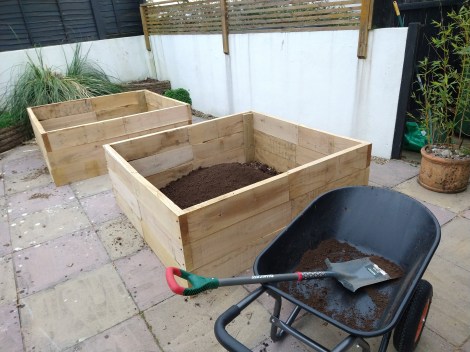
They were finally complete! All there was left to do was move four tonnes of soil from the front of the house into the beds. Simple really. By this stage in the day I was beat, though I wanted to shift as much as possible before it started to rain. I couldn’t move it all in one night, but managed to break the back of the first bag (and me) then covered the lot with plastic sheeting to stop any ingress of water. Having to move four tonnes of soil was bad. Moving that as mud would’ve been next to impossible.
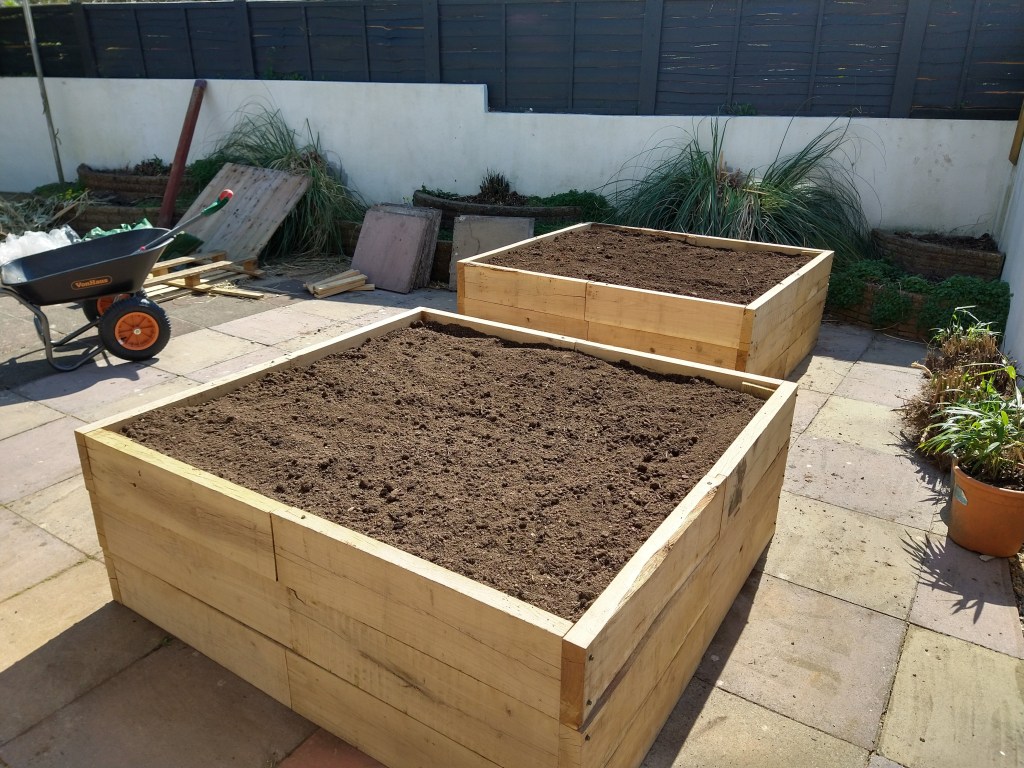
Et voila! The beds were assembled, the soil was in after several days of shoveling, and the only thing left to do is to plant the vegetables.
Would I do it again? Absolutely, but with some changes. I think I would invest in a heavy duty drill for the job; my tools are too lightweight. Definitely buy the longest sleepers you can afford because having to join them is unnecessary work and was the most time consuming part of the process. Otherwise it would’ve been a case putting four screws in for each layer. The screw type is important as well. I had done a little research and found out about Timberfix/Timberlok screws, but I hadn’t realised for oak sleepers they recommend stainless steel rather than carbon steel screws. Using stainless steel would have added additional challenges to this project, as they require pre-drilling and I’ve already talked about how hard drilling into this stuff was.
The total cost for materials and soil was in the ballpark of £550 for two beds. It’s not cheap but my hope is that using quality hardwood will mean the beds will last for many years to come. I was able to borrow some tools off Doug, and had plenty of my own so that kept the cost down somewhat. Power tools are a must if you’re going to take something on like this. Any questions, comments, suggestions, please let me know. For now, I’m going to get out in the garden and enjoy this beautiful weather. Stay safe!

If you’re interested in starting out with sourdough, let me know. I’m considering making some videos about it and writing a blog post as I have found a fairly bulletproof recipe for great loaves.

Leave a comment