It has been over a month since I’ve visited these pages – my recent writing efforts have been centred around the Lismaine Cottage blog, Cottage Life. But I have returned, with a gadget-related post. No, it’s not gaming, but it is something you may find useful. I’ve been trying to tidy up cables that have been lying around and organise the technology in the house, hiding the router and putting up trunking. This all started with a trip to B&Q and finished up with some tech-minded DIY.

I was looking for some parts to put together a kayak storage system (cool sentence, right?) when I came across the electronics and electrical section of B&Q. It had been years since my last visit and there was a lot of interesting new stuff, including power sockets with USB ports for charging devices.
Since almost all of our mobile devices are charged by USB, we’ve ended up with a heap of USB chargers clogging up sockets all over the house. There can two or three devices charging at once so that means a lot of plugs, and a lot of mess. The logical solution then is to build the chargers into the sockets, freeing up the plugs for other use.
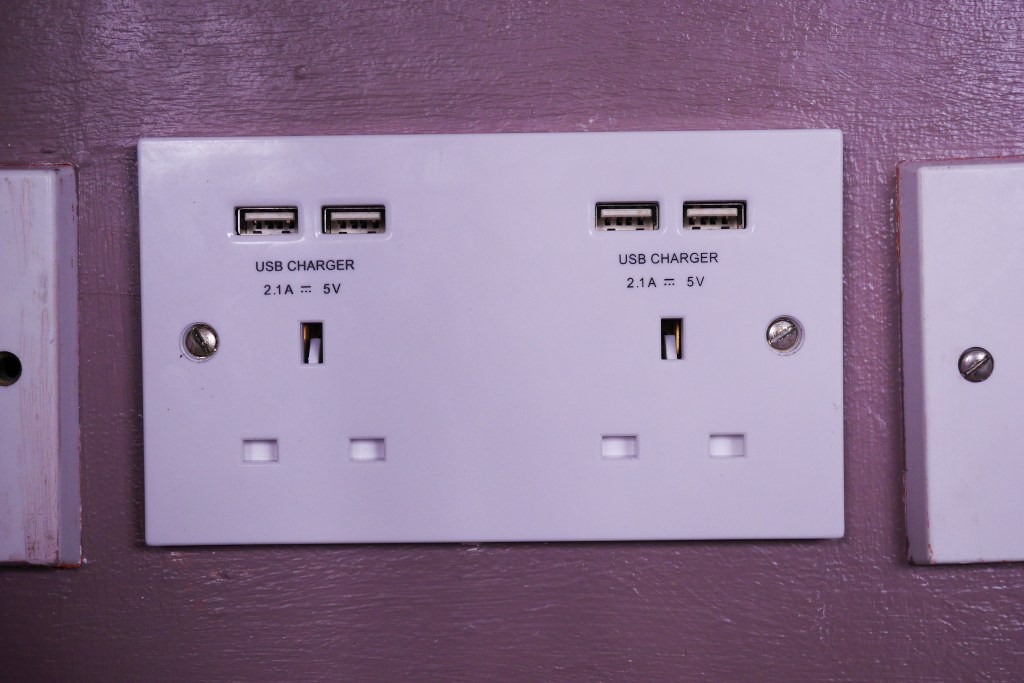
I went for a British General Model which was £16 in-store at B&Q in Sprucefield. It’s unswitched which is not exactly typical, but it provides four USB sockets with 2.1A across each pair. Installation is simple too, but only attempt it if you’re confident with basic electrical work and have turned off the power supply to your home. If you’re not happy around electrics, get a qualified electrician to install it for you.
**DISCLAIMER** Do not try this at home unless you are competent in working with electrics, and have turned off your power
Check out the gallery above for the steps involved.
Fitting the USB Socket
Like many of these small jobs, it wasn’t complex, but was quite fiddly. I was working in an awkward space, and some of the wires just about stretched.
First, unscrew the current socket and note the wiring. If it looks complicated, take a picture of the current wiring with your phone. This is a great tip in general for electrical stuff, as you can refer back to it when you inevitably forget the order of things. This was relatively simple, so I removed the current wires, and connected them in the same arrangement, live to live, neutral to neutral, and earth to earth. The awkward bit was fitting it back in place – it took a little bit of force to fit it in as it was slightly bigger than the last unit and there was less space for the wiring. All that was left was to screw the faceplate to the wall, et voila, job done. It’s really not a difficult thing to do, just make sure you go about it safely and isolate the power supply. Mains electricity is dangerous and can easily stop your heart, so don’t cut corners. If you’re not confident, get an electrician.
So far, so good. It works, and I’ve been able to get rid of three USB plugs in the process and tidied up the area around it. I’ve got the Echo Dot in one of the sockets, and the others are free to be used for charging devices. There you have it – a simple upgrade, and one I thoroughly recommend.


Leave a comment